

Project Planning
See also: Action PlanningOur Project Management page sets out the basics of how to manage projects, including drawing up a project plan. This page provides more detail about this process. It explains the elements of a project plan, and suggests a way in which to prepare one. It also offers a visual way to represent a project plan and timeline.
It is often said that a picture is worth a thousand words. If so, it is well worth your time to find out a bit about how to draw pictures that will represent your project plan! This page will help you understand how to do so, and also how to involve others in your planning.
Team Work and Collaboration
Project planning is a team activity, not one to do by yourself, unless you are the only person involved in the project. Everyone who is going to be involved should be part of drawing up the project plan and agreeing deadlines, resources and what needs to be done.
In the modern, hybrid workplace, this also means ensuring that both remote and in-office team members have equal access to a shared, "live" version of the project plan on an ongoing basis to check what needs doing.
The Building Blocks of Project Planning
The two basic building blocks of project plans are tasks and milestones.
- Tasks are the pieces of work that have to be done before the project is complete. They last a period of time, and require resources, people or money.
- Milestones are achievements, which happen at a defined point in time. They have no resource requirements, but are achieved as a result of task completion.
Today, many teams also use iterative or "Agile" planning. This means that instead of trying to plan every single task from beginning to end before starting, you plan the major milestones, but only map out the specific tasks for the next few weeks (often called a "sprint"). This allows your plan to remain flexible and adapt to changes as the project evolves.
Preparing a Project Plan
One of the best ways of project planning involves a collaborative brainstorming session with all the key people present. You can use two colours of physical post-it notes and a white board in an office, or a digital whiteboard tool (like Miro or Mural) if your team works remotely.
The process should run something like this:
Using one colour of post-it notes, write down all the milestones that you need to achieve on the way to the project outcome, and number them in chronological order. Stick them all down the left hand side of the board.
For each milestone, identify any others that need to be achieved first, before that one can be either started or finished (precursors) and write them on the post-it note for that milestone.
Now on a different colour of post-it notes, identify all the tasks that need to be done to achieve each milestone. Use common sense to decide what level of granularity you want to work at. For example, if your overarching project is a recruitment exercise, you’ll want to spell out each step, from preparing job descriptions, through advertising, sifting, interviewing, carrying out checks, and offering the job. However, for a much larger project, you might include a task to ‘recruit project administrator’.
For each task, identify which milestones they feed and write the milestone number on the post-it for the task. Write the feeder tasks on the post-it for each milestone.
Identify how long each task is going to take and write it on the task post-it.
Identify what resources or specific team members you need to achieve each task, and write it on the post-it.
At this point, you may find that you have too much information for the post-it notes. If so, either add others in different colours for duration and resources, or use the comments feature if you are using a digital whiteboard.
Now identify any time constraints on any milestones or tasks, such as ‘must be completed before the end of the financial year’. Write them on the post-it.
Make a calendar on the white board, setting out the duration of the project, period by period.
Place all the milestones and tasks that have a time constraint in the right place on the calendar.
Now place all the other milestones and tasks that are linked to those with a time constraint, and draw arrows between them to show which order they need to be completed. Make sure that you have left enough time for each task to be completed according to your estimate.
If you have any milestones or tasks left, place those at a suitable point.
You should now be able to see the ‘critical path’, the process that determines how long your project will take.
Use a whiteboard pen to mark on potential ‘slack’, that is, where tasks can slip a little without affecting the critical path.
Finally, look at what resources you will need in any given period. If you need additional resources, make sure that you have given yourself time and money to acquire them.
You now have a simple Gantt chart and project plan!
Visually Representing a Project
Depending on how long your project will run, you may or may not be able to rely on keeping the white board with post-it notes. If you can, this may be the best, most flexible and most obviously visible way of keeping a record of your project plan, which can be updated in real time to reflect changes. However, if you can’t, you’ll need an alternative.
Project Planning Software
Project planning software, such as Microsoft Project, or modern cloud-based alternatives like Asana, Trello, and Monday.com, are available to draw up project plans. They will take your information, in the form of lists of tasks, with deadlines, and milestones with dates, and put it into a visual form. It helps you to set out what you’ve got to do, how long it will take, and links between tasks.
However, traditional software can also encourage you to over-complicate, and get lost in the detail, rather than focus on the big picture. The end result is likely to be a diagram of such complexity that nobody can understand it. You may therefore find it easier to use the brainstorming process above, and then draw a simpler picture, such as a ‘bar and star’ chart, or utilise a highly visual Kanban board.
Bar and Star Charts
A bar and star chart is a simple form of Gantt chart.
Once you have identified your tasks and milestones, anyone can draw up a bar and star chart with either ruler and pencil, or a program like PowerPoint.
It uses only three elements: bars for tasks, stars for milestones, and elbow connectors in between. Use the ‘connectors’ to link together bars and stars.
An example of a star and bar chart:

The important thing is to keep your star and bar chart simple, so that it can fit easily on a single page. If you have too many tasks and milestones, combine some of them for clarity.
Kanban Boards
A Kanban board is a highly visual, agile way to manage tasks as they move through a workflow.
Instead of focusing on a timeline, a Kanban board focuses on status. The board is divided into vertical columns representing stages of work—most commonly "To Do", "In Progress", and "Done". Each task from your project plan is represented by a card. As a team member works on a task, they physically (or digitally) drag the card from one column to the next.
Kanban boards are incredibly popular because they are simple, they prevent team members from taking on too much work at once, and they allow everyone to see exactly what is being worked on at a glance.
Conclusion
Remember that it is never enough to simply draw up a fantastic project plan. You also need to implement it, and that requires constant visibility and collaboration.
Whether you use a physical board in the office or modern cloud-based software, make sure that your project plan is kept in an obvious, accessible place. Ensure that everyone on the team is involved in updating it regularly—or better still, that they have the autonomy to update and annotate their own tasks. When team members can visually see how their tasks contribute to the final milestone, they are far more likely to take ownership, ensuring your project is a success.
Further Reading from Skills You Need
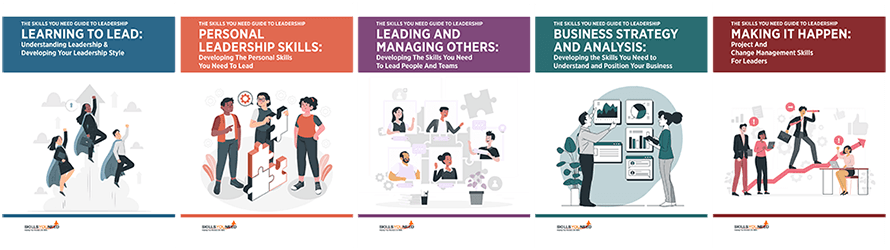
The Skills You Need Guide to Leadership eBooks
Learn more about the skills you need to be an effective leader.
Our eBooks are ideal for new and experienced leaders and are full of easy-to-follow practical information to help you to develop your leadership skills.
Continue to:
Project Management Skills
Action Planning
See also:
Risk Management
Delegation Skills
Time Management